The Quest for the Perfect New York Cheesecake
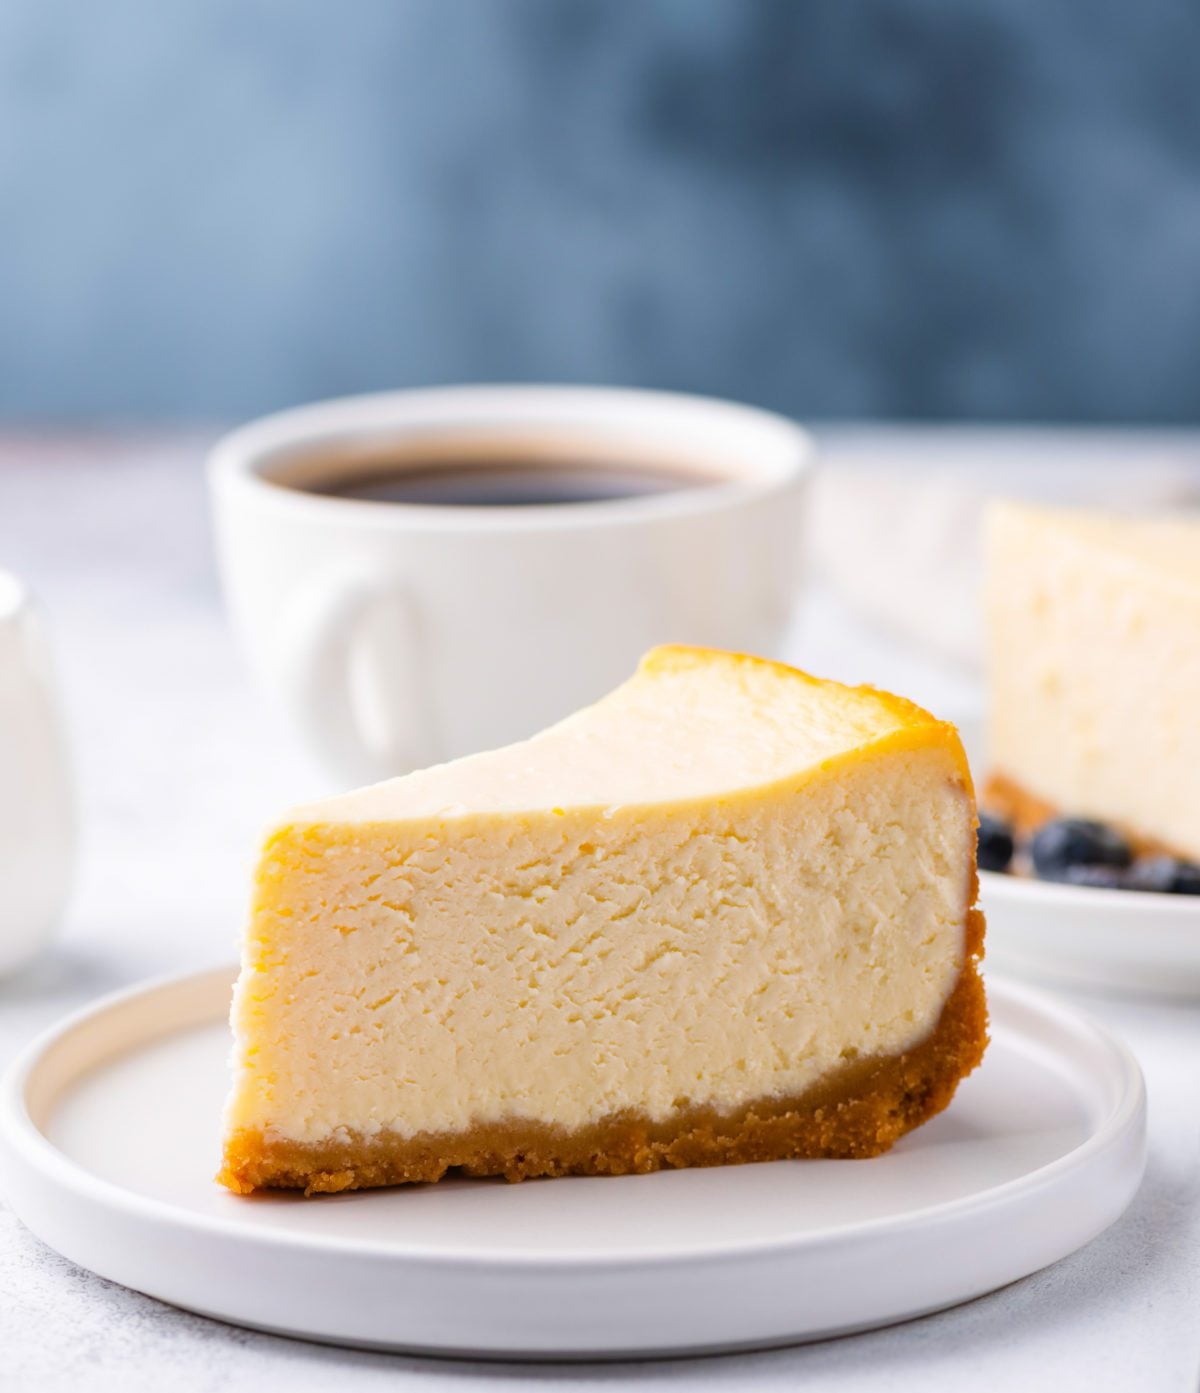
Few desserts command the same universal adoration as the Classic New York Cheesecake: Rich, Creamy, & Undeniably Dense. Its signature velvety texture, robust flavor, and satisfying density make it a timeless classic, a true crowd-pleaser that transcends geographical boundaries. But anyone who has attempted this culinary marvel knows that achieving that picture-perfect, crack-free, and sumptuously smooth result can be a delicate dance. Often, home bakers are frustrated by dry, crumbly edges or unsightly fissures marring the top of their otherwise delicious creation.
The secret to mastering this iconic dessert, the technique that elevates a good cheesecake to an extraordinary one, lies in a method surprisingly simple yet profoundly effective: the water bath. Often called a "bain-marie," this technique is the unsung hero behind countless professional-quality cheesecakes, ensuring a result that is consistently creamy, perfectly set, and beautifully crack-free.
What Defines an Authentic New York Cheesecake?
Before diving into the mechanics of the water bath, let's appreciate what makes the New York-style cheesecake distinct. While cheesecake, in its broadest sense, is a dessert made from a soft fresh cheese (like cream cheese, ricotta, or quark), eggs, and sugar, the New York variety stands apart. It's characterized by its:
- Richness and Density: Unlike lighter, fluffier cheesecakes, the New York style boasts a substantial, almost custardy density. It’s undeniably rich but should never feel heavy or pasty.
- Creamy, Smooth Texture: The ideal New York cheesecake melts in your mouth, leaving a silky, unblemished sensation. This is where the water bath truly shines.
- Signature Flavor Profile: Typically, the flavor is predominantly vanilla, often complemented by a hint of lemon zest or other subtle spices that enhance the tang of the cream cheese without overpowering it.
- Graham Cracker Crust: While some cheesecakes feature pastry or sponge cake bases, a New York cheesecake almost invariably rests on a buttery graham cracker crust, providing a delightful textural contrast. Some recipes extend the crust up the sides of the pan, while others keep it strictly on the base for a cleaner edge.
This dessert is usually baked, then chilled, and can be served plain or adorned with a variety of toppings like fresh fruit, whipped cream, or a vibrant fruit sauce. The goal is always a Secrets to a Flawless New York Cheesecake: Dense, Creamy, Crack-Free that delights both the eye and the palate.
The Water Bath: Unpacking the Science Behind its Indispensability
So, why go to the "fuss" of wrapping your cheesecake pan and placing it in a bath of water? The reasons are rooted in fundamental baking science, and understanding them highlights why this technique is absolutely essential for a truly perfect new york cheesecake.
Humidity: Your Anti-Cracking Shield
Your conventional oven is an incredibly dry environment. While this is fantastic for crisping cookies or browning roasts, it poses a significant challenge for delicate, custard-based desserts like cheesecake. The dry heat aggressively draws moisture from the surface of the cheesecake as it bakes. This rapid evaporation causes the outer layer to set and dry out faster than the interior, leading to tension. As the internal structure continues to cook and expand, this surface tension eventually gives way, resulting in the dreaded cracks that mar your otherwise beautiful dessert.
Enter the water bath. By surrounding the cheesecake with hot, steaming water, you create a humid micro-environment within your oven. This moisture-rich air drastically slows down the rate of surface evaporation from the cheesecake. With less moisture loss from the top, the cheesecake's surface remains soft and supple, allowing it to expand and set gently and evenly with the rest of the cake. No rapid drying, no surface tension, no cracks – just a perfectly smooth, unblemished top.
Gentle, Even Heat: The Key to a Velvety Texture
Cheesecake batter, at its heart, is a custard. It's a delicate emulsion of dairy, eggs, and sugar. The proteins in the eggs and cheese are sensitive to heat; if exposed to high, direct heat too quickly, they can curdle, seize, or become rubbery. This rapid coagulation can lead to a crumbly, inconsistent, or grainy texture instead of the desired velvety smoothness.
The water bath acts as a thermal buffer. Water heats up and cools down more slowly than air. By submerging your cheesecake pan in a pan of water, you're insulating it from the oven's direct, fluctuating heat. The water transfers heat to the cheesecake much more gently and evenly, maintaining a consistent, moderate temperature around the dessert. This allows the proteins in the cheesecake batter to set slowly and gradually, forming a tender, cohesive matrix that results in that signature dense-yet-light, creamy, and melt-in-your-mouth texture that is the hallmark of a truly great new york cheesecake.
Mastering the Water Bath: Practical Steps and Tips
Executing the water bath technique is straightforward, but a few crucial steps ensure success and prevent common pitfalls.
1. Preparing Your Springform Pan for Battle
The most common anxiety with a water bath is water seeping into the cheesecake. This is entirely preventable with proper wrapping:
- Heavy-Duty Foil is Your Friend: Use wide, heavy-duty aluminum foil. Regular foil is more prone to tearing.
- Double (or Even Triple) Wrap: Tear off two or three long sheets of foil. Place your springform pan in the center of the first sheet and bring the sides up tightly around the pan, crimping the foil firmly against the rim. Repeat with the second (and third) sheet, ensuring each layer overlaps and is sealed securely. Aim for the foil to extend well above the cheesecake batter line.
- Consider a Barrier: For absolute peace of mind, after wrapping in foil, some bakers place the entire wrapped springform pan into a large oven-safe plastic roasting bag (available in most grocery stores) before placing it in the water bath. This adds an extra layer of protection against leaks.
2. Setting Up the Bath
- Choose the Right Roasting Pan: Select a roasting pan or other large, oven-safe dish that is significantly larger than your springform pan, allowing at least an inch or two of space around the circumference. This space is vital for even heat distribution.
- Place in the Oven First: It's often easiest to place the large roasting pan into the oven first, on the middle rack. This prevents having to carry a heavy, sloshing pan of water into the oven.
- Add Hot Water: Carefully place your foil-wrapped springform pan into the larger roasting pan. Then, pour steaming hot tap water (not boiling, as this can cause the cheesecake to cook too aggressively initially) into the larger pan, aiming for about 1 to 2 inches of water depth around the springform pan. The water should come up at least halfway, if not two-thirds, of the way up the sides of your springform pan.
3. Baking with Confidence
Once the water bath is set, gently slide the oven rack back into place and begin baking according to your recipe. Resist the urge to open the oven door frequently, as this can disrupt the delicate temperature and humidity balance.
Achieving the Perfect "Jiggle": Knowing When Your Cheesecake is Done
Perhaps the most critical moment in baking a new york cheesecake is determining its doneness. Unlike cakes that are done when a toothpick comes out clean, a cheesecake should *not* be completely firm when removed from the oven. Over-baking is a primary cause of dryness and cracking.
The "Jiggle Test": Your Best Indicator
Once the baking time is nearing its end, gently open the oven door and carefully nudge the roasting pan. Observe the cheesecake:
- Outer Ring: The outer 1-2 inches of the cheesecake should appear set, slightly puffed, and relatively firm.
- Inner Circle: The very center, a circle about 2-3 inches in diameter, should still have a slight jiggle – like a perfectly set Jell-O or a firm custard. It should not be a wobbly slosh, indicating liquid beneath the surface, but rather a subtle, gentle tremor.
Troubleshooting Doneness
- Underdone Cheesecake: If the outer ring is still very jiggly or the center has a pronounced wobble that suggests liquid, continue baking in 5-minute increments. Check frequently, as it can go from underdone to overdone quickly.
- Over-baked Cheesecake: If the entire surface looks puffed and firm, with no jiggle in the center, it's likely over-baked. While still edible, it may result in a drier, potentially cracked texture.
Once your cheesecake passes the jiggle test, turn off the oven and prop the oven door open slightly (you can use a wooden spoon). Let the cheesecake cool in the water bath within the cooling oven for about an hour. This gradual cooling prevents thermal shock, which can also contribute to cracks. After an hour, carefully remove it from the oven and the water bath, remove the foil, and let it cool completely on a wire rack at room temperature before chilling it in the refrigerator for at least 6-8 hours, or preferably overnight. Patience during cooling and chilling is just as crucial as the baking process itself for that truly flawless new york cheesecake.
Mastering the New York cheesecake is a rewarding endeavor, and the water bath technique is undoubtedly your most valuable tool in achieving perfection. By understanding its scientific principles and implementing the practical steps, you're well on your way to baking a dessert that is not only incredibly delicious but also visually stunning – rich, dense, creamy, and flawlessly crack-free.
